Prep Time: 30 minutes (active) | Proofing Time: 10-14 hours (mostly hands-off) | Bake Time: 20-25 minutes
Total Time: 11-15 hours
Difficulty: Medium (Requires an active sourdough starter)
Yield: 12 soft, fluffy rolls
There’s nothing quite like the aroma of freshly baked bread filling your home. These sourdough dinner rolls elevate any meal from ordinary to extraordinary. With a crisp, golden crust, a tender, tangy crumb, and a beautiful blistered top, they are the perfect blend of artisanal technique and comforting tradition. While the process is spread over a day, the active hands-on time is minimal, making it a rewarding project for bakers of all levels. Your patience will be richly rewarded at the dinner table.
Ingredients
For the Dough:
1 cup (240g) active, bubbly sourdough starter (100% hydration)
1 cup (240g) whole milk, lukewarm
3 tablespoons (42g) unsalted butter, melted and slightly cooled, plus more for brushing
2 tablespoons (25g) granulated sugar
1 large egg, at room temperature
1 ½ teaspoons (9g) fine sea salt
3 ½ – 4 cups (420g – 480g) bread flour, plus more for dusting
For Topping (Optional):
Flaky sea salt
Freshly chopped rosemary or thyme
Equipment
Stand mixer with dough hook (or a large bowl and sturdy wooden spoon)
Medium mixing bowl
Kitchen scale (highly recommended for accuracy)
Plastic wrap or damp kitchen towel
9×13 inch baking pan
Pastry brush
Instructions
Day 1: Evening – Mixing & Bulk Fermentation (Hands-on: 20 min | Rest: 8-12 hrs)
Activate Your Starter: Ensure your sourdough starter is active, bubbly, and has been fed 4-12 hours before you begin. It should pass the float test (a small spoonful dropped in water floats).
Combine Wet Ingredients: In the bowl of a stand mixer, combine the active starter, lukewarm milk, melted butter, sugar, and egg. Whisk by hand until smooth.
Incorporate Dry Ingredients: Add the salt and 3 ½ cups (420g) of the bread flour to the wet ingredients. Using the dough hook attachment, mix on low speed until a shaggy dough forms, about 2-3 minutes.
Knead the Dough: Increase speed to medium-low and knead for 6-8 minutes. The dough should start to pull away from the sides of the bowl and become smooth and slightly tacky, but not overly sticky. If it remains very sticky, add the remaining flour, one tablespoon at a time, until it reaches the desired consistency.
First Rise: Lightly oil a clean, large bowl. Shape the dough into a ball and place it in the bowl, turning to coat in oil. Cover tightly with plastic wrap or a damp towel.
Bulk Ferment: Place the covered bowl in a cool, draft-free spot (like a turned-off oven or microwave) and let it ferment for 8-12 hours, or overnight. The dough should rise significantly, look puffy, and may have some bubbles on the surface.
Day 2: Morning – Shaping & Final Proof (Hands-on: 15 min | Rest: 2-3 hrs)
Prepare the Pan: Generously butter a 9×13 inch baking pan.
Divide the Dough: Turn the risen dough out onto a very lightly floured surface. Using a bench scraper or sharp knife, divide the dough into 12 equal pieces (weighing them for uniformity is helpful—they should be ~85g each).
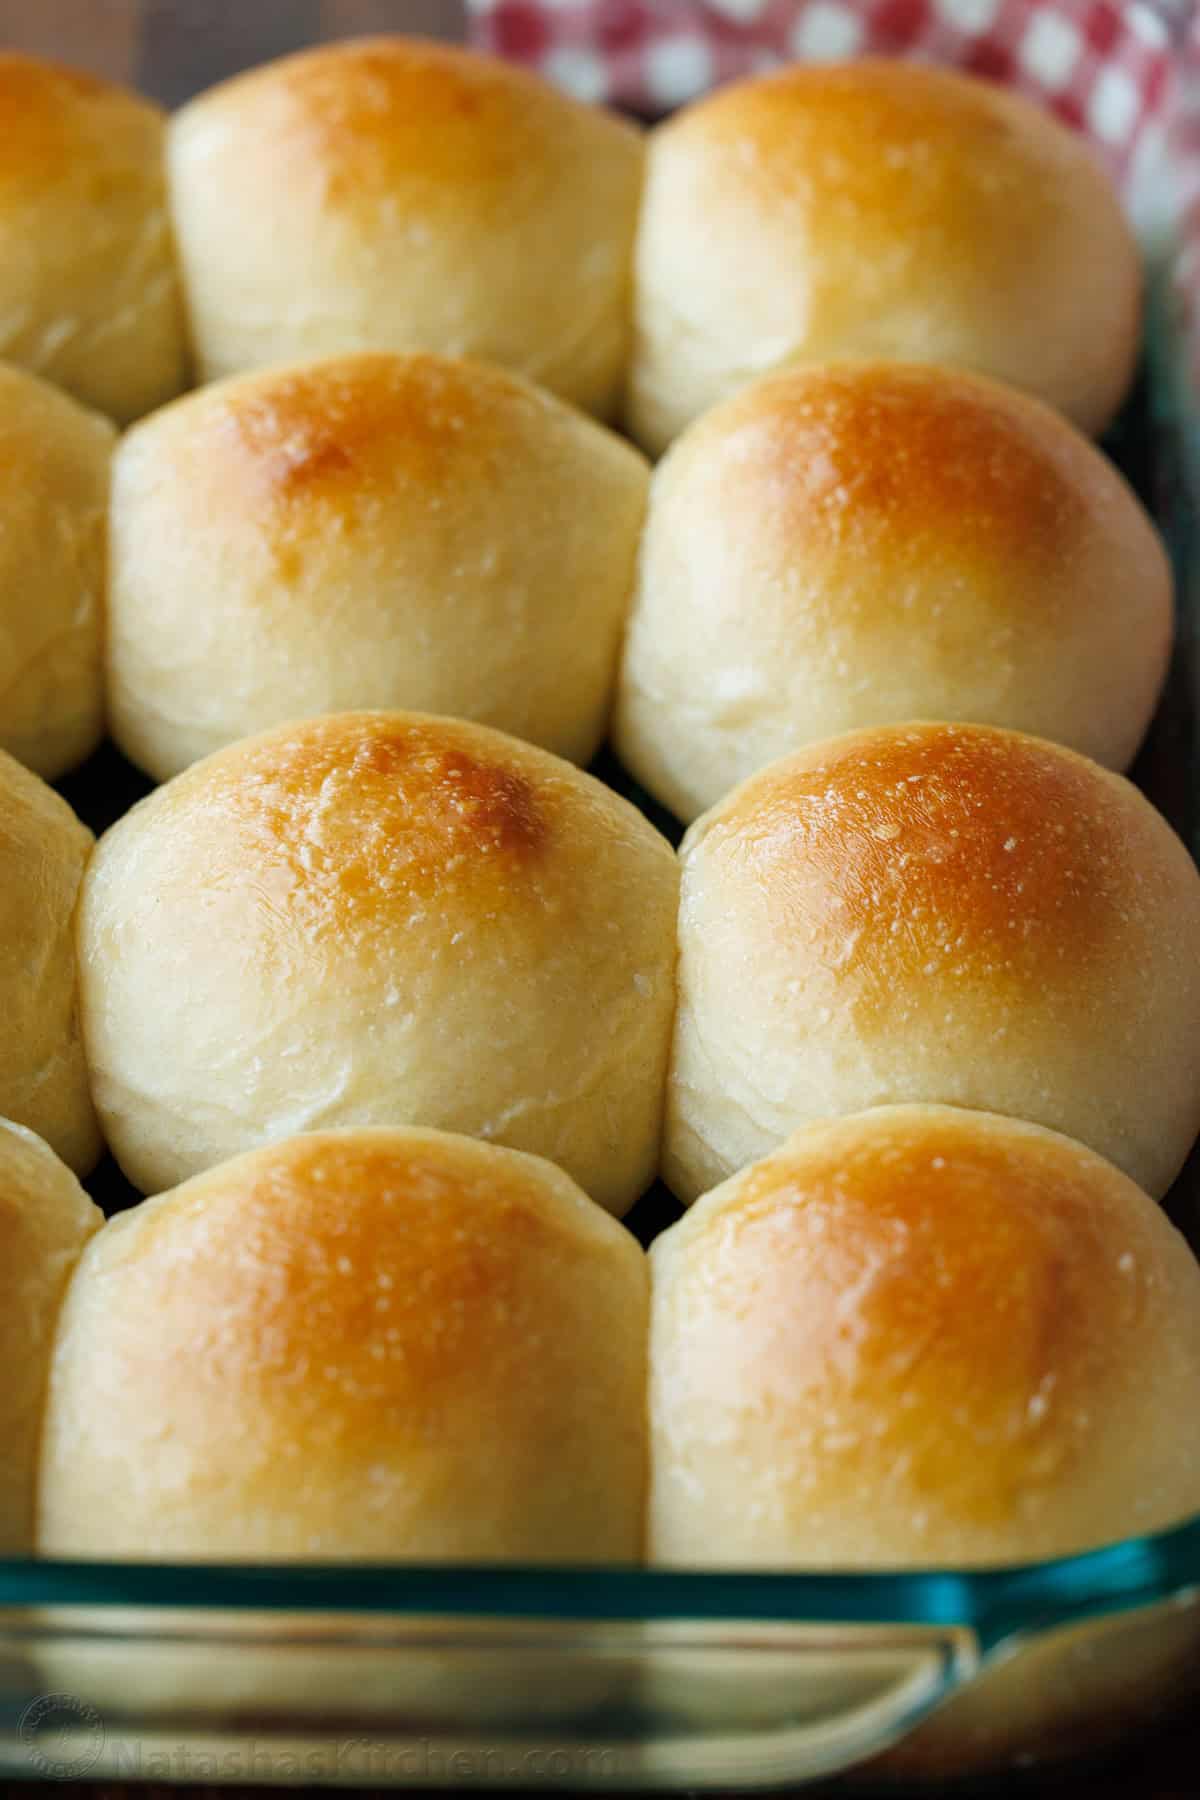
Shape the Rolls: Take one piece of dough. Using your cupped hand and the un-floured surface, gently roll it in a tight circular motion until it forms a smooth, taut ball. Place the shaped roll into the prepared pan. Repeat with the remaining dough, arranging them in 3 rows of 4, with a little space between each.
Final Proof: Cover the pan loosely with plastic wrap or a damp towel. Let the rolls proof in a warm spot until they are puffy, have filled the pan, and spring back slowly when gently poked, about 2-3 hours.
Day 2: Baking & Serving (Hands-on: 5 min | Bake: 25 min)
Preheat Oven: About 30 minutes before baking, preheat your oven to 375°F (190°C).
Bake: Uncover the rolls and place the pan in the center of the preheated oven. Bake for 20-25 minutes, or until the tops are a deep, glorious golden brown and the internal temperature registers at least 190°F (88°C) on an instant-read thermometer.
Butter & Season: Immediately upon removing from the oven, brush the hot rolls generously with melted butter. Sprinkle with flaky sea salt and herbs, if using.
Cool & Serve: Let the rolls cool in the pan for 5 minutes, then transfer to a wire rack. They are best served warm, pulled apart with friends and family. The irresistible pull-apart texture and rich, buttery crust are worth the wait.
Baker’s Notes & Tips for Success
Starter Readiness is Key: This recipe hinges on an active, healthy starter. If yours isn’t passing the float test, feed it and wait a few more hours.
The Long, Cold Ferment: The overnight bulk ferment develops the complex, tangy flavor. A cooler room will take closer to 12 hours; a warmer one may take only 8. Don’t rush it.
Shaping for Height: Creating a tight, smooth surface tension when shaping is the secret to rolls that rise up, not just out.
Make Ahead: Shaped rolls can be covered and refrigerated after their final proof for up to 24 hours. Let them sit at room temperature for 1 hour before baking.
Storage: Keep leftover rolls in an airtight bag at room temperature for 2 days. Reheat wrapped in foil in a 350°F oven for 10 minutes. They also freeze beautifully for up to 3 months.
Nutrition Information (Per Roll)
Calories: ~220 kcal
Total Fat: 5g
Saturated Fat: 3g
Cholesterol: 25mg
Sodium: 320mg
Total Carbohydrates: 37g
Dietary Fiber: 1g
Sugars: 3g
Protein: 6g