Prep Time: 20 minutes
Chill Time: 30–60 minutes (minimum 30 minutes)
Total Time: 50–80 minutes
Difficulty: Easy
No cooking required (no-bake recipe)
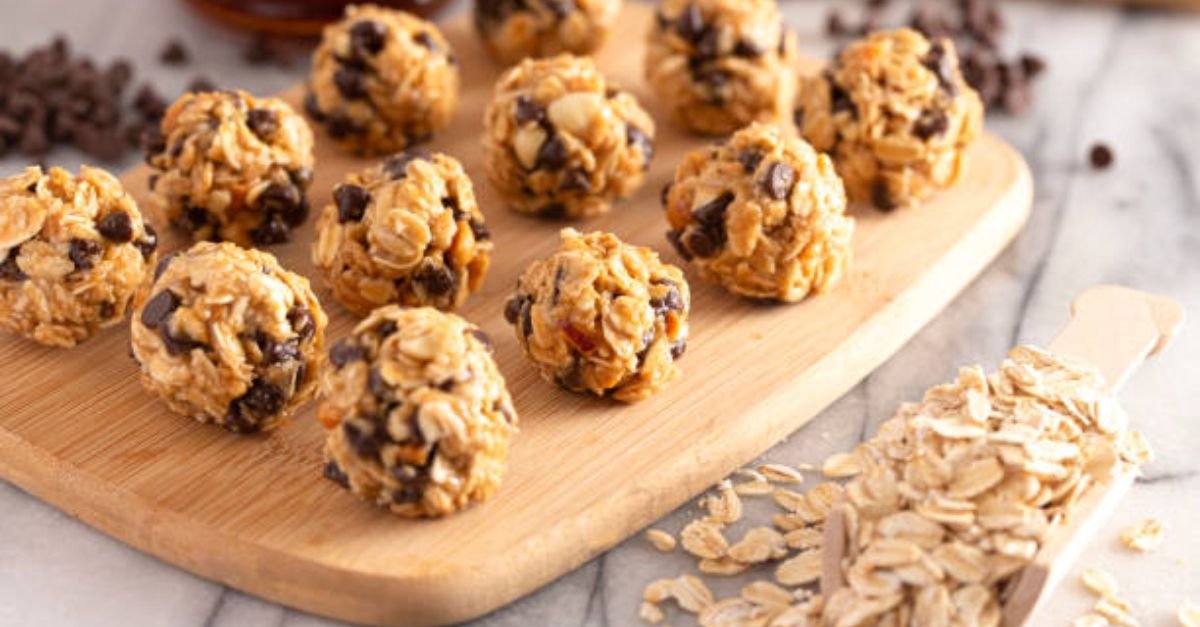
These no-bake protein balls combine rolled oats, protein powder, nut butter, and honey into a portable, energy-dense snack. They are ideal for meal prep, post-workout recovery, or a mid-afternoon pick-me-up. The recipe is flexible: you can swap the nut butter, sweetener, or add-ins to suit your taste.
Ingredients
Base Ingredients
1½ cups (135 g) rolled oats (old-fashioned oats; not instant)
½ cup (45–50 g) vanilla or chocolate whey protein powder (or plant-based protein powder)
½ cup (125 g) natural creamy peanut butter (or almond butter)
¼ cup (85 g) honey (or maple syrup for a vegan option)
1 tsp vanilla extract
2–3 tbsp milk of choice (dairy or plant-based), added 1 tbsp at a time
¼ tsp salt (optional, enhances flavor)
Optional Add-Ins (choose 1–2)
2 tbsp mini dark chocolate chips
2 tbsp chopped nuts (walnuts, almonds, pecans)
2 tbsp dried cranberries or raisins
1 tbsp chia seeds or ground flaxseed
1 tbsp shredded coconut (for rolling)
Equipment
Large mixing bowl
Measuring cups and spoons
Wooden spoon or silicone spatula
Small bowl (for optional rolling coatings)
Airtight storage container
Baking sheet or plate lined with parchment paper
Instructions with Time and Intensity
Step 1: Combine Dry Ingredients — 2 minutes | Low Intensity
In a large mixing bowl, stir together the rolled oats, protein powder, and salt until evenly distributed. Break up any lumps in the protein powder with the back of your spoon.
Intensity note: Gentle stirring only; no vigorous mixing needed at this stage.
Step 2: Add Wet Ingredients — 3 minutes | Medium Intensity
Add the peanut butter, honey, and vanilla extract to the dry mixture. Stir firmly with a wooden spoon until the mixture becomes crumbly and begins to hold together. This takes about 2–3 minutes of steady mixing; the mixture should look like coarse, sticky sand.
Intensity note: Medium effort — the mixture is thick and requires firm stirring. If it feels too stiff, do not add milk yet; continue mixing, as the warmth of your hands and continued stirring will help it come together.
Step 3: Adjust Consistency — 2–3 minutes | Low–Medium Intensity
Add milk 1 tablespoon at a time, mixing after each addition. Stop adding milk as soon as the mixture holds together when pressed between your fingers. You will typically need 2–3 tablespoons total, depending on the protein powder and nut butter used. Fold in any optional add-ins (chocolate chips, nuts, dried fruit, seeds) at this point.
Intensity note: Low to medium. Avoid over-mixing, which can make the balls dense and gummy.
Step 4: Chill the Mixture (Optional but Recommended) — 10–15 minutes | No Effort
Place the bowl in the refrigerator for 10–15 minutes. Chilling firms the mixture slightly and makes rolling easier and less sticky.
Intensity note: Passive time; no active work required.
Step 5: Roll the Balls — 8–10 minutes | Medium Intensity
Scoop about 1 tablespoon (approximately 25 g) of the mixture and roll between your palms into a ball. If the mixture sticks to your hands, lightly dampen your palms with water or chill the mixture for another 5 minutes. Repeat with the remaining mixture to make about 20 balls.
Intensity note: Medium — rolling requires hand pressure and coordination. Work efficiently to keep the mixture from warming up too much.
Step 6: Optional Coating — 3–5 minutes | Low Intensity
Roll each ball in shredded coconut, crushed nuts, or a light dusting of cocoa powder if desired. This adds texture and prevents sticking.
Intensity note: Low; gentle rolling only.
Step 7: Final Chill — 30–60 minutes | No Effort
Arrange the balls on a parchment-lined plate or baking sheet and refrigerate for at least 30 minutes (up to 60 minutes for a firmer texture). This final chill sets the balls so they hold their shape.
Intensity note: Passive time; no active work required.
Step 8: Store — 1–2 minutes | Low Intensity
Transfer the chilled balls to an airtight container. Store in the refrigerator for up to 1 week, or freeze for up to 3 months (thaw in the refrigerator before eating).
Intensity note: Low; simple transfer and labeling.
Time and Intensity Summary
Stage Time Intensity
Combine dry ingredients 2 min Low
Add wet ingredients 3 min Medium
Adjust consistency and add mix-ins 2–3 min Low–Medium
Chill mixture (optional) 10–15 min None (passive)
Roll balls 8–10 min Medium
Optional coating 3–5 min Low
Final chill 30–60 min None (passive)
Store 1–2 min Low
Total active time ~20 min —
Total time (including chilling) ~50–80 min —
Tips for Success
Use a protein powder you enjoy the taste of. Protein powder dominates the flavor of these balls; a gritty or strongly flavored powder will affect the final result.
Adjust sweetness to taste. If your protein powder is heavily sweetened, reduce the honey to 3 tablespoons.
Keep the mixture cool. Warm kitchens make the mixture sticky; chill it briefly before rolling if needed.
Measure the oats accurately. Too many oats make dry, crumbly balls; too few make them sticky and soft.
Press firmly when rolling. Compact balls hold together better and resist crumbling.
For vegan balls: Use maple syrup instead of honey and a plant-based protein powder and milk.
Nutrition Information (Per Ball, Approximate)
Based on 20 balls per batch, using whey protein powder, natural peanut butter, honey, and unsweetened almond milk, without optional add-ins. Values are estimates and will vary by brand and exact ingredients.
Nutrient Amount per Ball
Calories ~95 kcal
Protein ~5 g
Carbohydrates ~9 g
– of which sugars ~4 g
Fat ~4.5 g
– of which saturated fat ~1 g
Fiber ~1.5 g
Sodium ~35 mg