Prep Time: 25 minutes
Cook Time: 50-55 minutes
Cooling Time: 2 hours (minimum)
Total Time: 3 hours 20 minutes
Servings: 10-12 slices
Skill Level: Easy to Intermediate (Requires careful melting of chocolate and proper egg whipping, but no complex techniques).
Intensity: Medium-Low Effort. This is a primarily mixing-bowl recipe. The most demanding aspect is patiently folding the mixtures together to maintain the cake’s airy structure.
Dietary: Naturally Gluten-Free. Can be adapted to be Dairy-Free (see notes).
Ingredients
For the Cake:
200g (7 oz) high-quality dark chocolate (70% cocoa), chopped
150g (⅔ cup) unsalted butter, cubed (plus extra for greasing)
4 large eggs, separated, at room temperature
120g (½ cup + 2 tbsp) granulated sugar, divided
1 tsp pure vanilla extract
200g (2 cups) finely ground almond flour (almond meal)
¼ tsp fine sea salt
2 medium firm-sweet apples (like Honeycrisp or Braeburn), peeled, cored, and cut into ½-inch cubes
For the Topping & Decoration:
1 medium apple, thinly sliced (a mandoline works best)
1 tbsp lemon juice
1 tbsp apricot jam or honey, warmed (for glaze)
Flaky sea salt (like Maldon) and powdered sugar for dusting (optional)
Whipped cream or vanilla ice cream, for serving
Equipment
9-inch (23cm) springform pan
Parchment paper
Mixing bowls (small, medium, large)
Heatproof bowl for double boiler
Electric hand mixer or stand mixer
Rubber spatula
Step-by-Step Instructions
Step 1: Prepare and Preheat
Preheat your oven to 350°F (175°C) with a rack in the center position. Generously butter the bottom and sides of your springform pan. Line the bottom with a round of parchment paper and butter the paper. This ensures your rich cake releases perfectly.
Step 2: Melt Chocolate and Butter
Create a double boiler: Place a heatproof bowl over a saucepan of gently simmering water, ensuring the bowl doesn’t touch the water. Add the chopped dark chocolate and cubed butter. Stir occasionally with a spatula until completely melted, smooth, and glossy. Remove the bowl from the heat and let it cool slightly while you prepare the other components. Pro Tip: Letting it cool for 5-10 minutes prevents it from cooking the egg yolks in the next step.
Step 3: Prepare the Apples and Dry Ingredients
Toss the cubed apples in a small bowl and set aside. In another bowl, whisk together the ground almond flour and salt. This ensures even distribution and prevents lumps. In a separate small bowl, toss the thin apple slices for the top with lemon juice to prevent browning.
Step 4: Whip Eggs and Sugar
This step is crucial for the cake’s structure. In a large, clean bowl, use an electric mixer to whip the 4 egg yolks with half of the sugar (60g) and the vanilla extract on medium-high speed for 3-4 minutes, until the mixture is pale, thick, and has doubled in volume.
In another spotlessly clean bowl, whip the 4 egg whites on medium speed until foamy. Gradually add the remaining sugar (60g), increase the speed to high, and whip until you achieve stiff, glossy peaks. This meringue will give the dense cake its lift.
Step 5: Combine the Batter
Combine Wet Base: Pour the slightly cooled chocolate-butter mixture into the whipped egg yolk mixture. Gently fold with a spatula until just combined.
Incorporate Dry Ingredients: Add the almond flour mixture to the chocolate-yolk base. Fold gently but thoroughly until no dry streaks remain.
Fold in Apples & Meringue: Gently fold in the cubed apples. Now, add one-third of the whipped egg whites to the chocolate batter and fold vigorously to lighten the heavy mixture. This makes folding the rest easier. Carefully add the remaining egg whites in two additions, using slow, gentle, sweeping folds from the bottom up. Stop as soon as the white streaks disappear. Do not overmix!
Step 6: Bake to Perfection
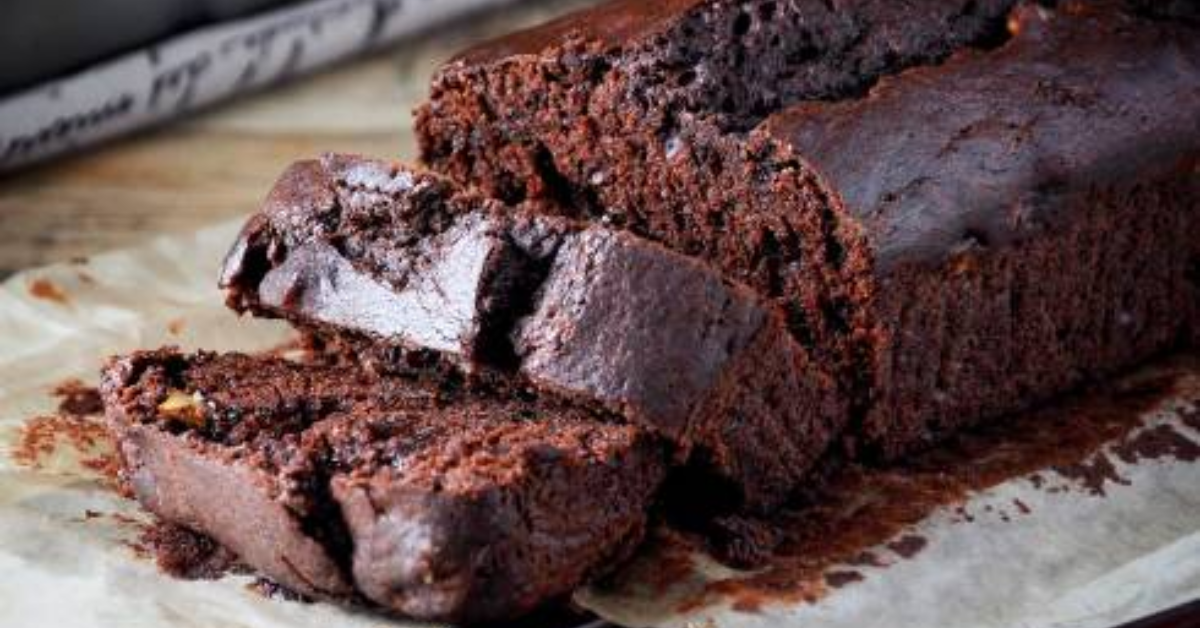
Pour the batter into your prepared pan and smooth the top with your spatula. Artfully arrange the lemon-coated apple slices on top in a concentric circle. Bake for 50-55 minutes. The cake is done when the top is set, the edges are slightly pulling away from the pan, and a toothpick inserted into the center comes out with a few moist crumbs (not wet batter). The center will still have a slight jiggle.
Step 7: The Crucial Cool
This cake must cool completely to set its fudgy texture. Let it cool in the pan on a wire rack for 1 hour. Then, carefully run a knife around the edge, release the springform clasp, and let the cake cool completely on its base for at least another hour before attempting to slice. For the cleanest slices and deepest flavor, you can even refrigerate it, covered, for 3-4 hours or overnight.
Step 8: Final Touches & Serve
Once completely cool, brush the top with warmed apricot jam for a beautiful glossy finish. Optionally, dust lightly with powdered sugar and a delicate sprinkle of flaky sea salt to enhance the chocolate flavor. Serve each slice at room temperature with a dollop of freshly whipped cream or a scoop of vanilla ice cream.
Nutritional Information (Per serving, based on 12 servings)
Calories: ~385 kcal
Total Fat: 30g
Saturated Fat: 12g
Cholesterol: 95mg
Sodium: 75mg
Total Carbohydrates: 28g
Dietary Fiber: 4g
Sugars: 22g
Protein: 7g