Prep Time: 45 minutes | Cook Time: 1 hour 15 minutes | Chill Time: 8 hours (minimum) | Total Time: 10 hours
Difficulty: Intermediate | Yield: 12 slices | Category: Dessert
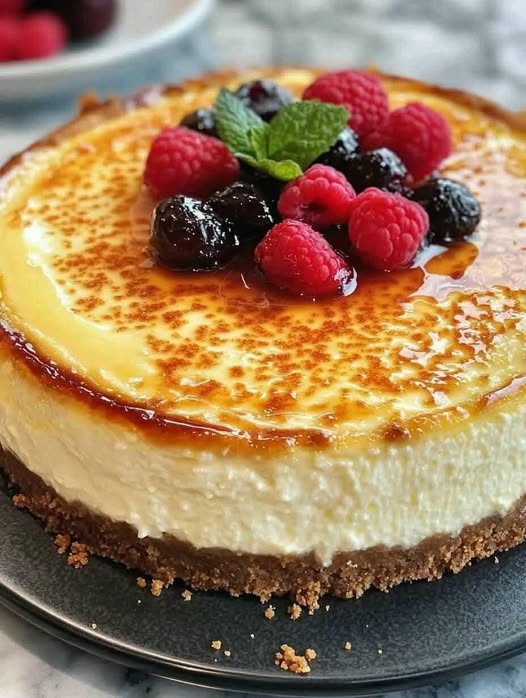
Indulge in the ultimate dessert fusion where the velvety richness of New York-style cheesecake meets the iconic crackle of a caramelized crème brûlée topping. This Crème Brûlée Cheesecake is a showstopper, featuring a creamy, vanilla-bean-speckled filling nestled in a buttery graham cracker crust, all crowned with a thin, glass-like layer of torched sugar. It’s a sophisticated dessert perfect for holidays, celebrations, or when you simply want to impress.
Ingredients
For the Graham Cracker Crust:
2 cups (about 200g) graham cracker crumbs (from roughly 15 full sheets)
1/3 cup (67g) granulated sugar
1/2 cup (113g) unsalted butter, melted
Pinch of salt
For the Cheesecake Filling:
4 (8-ounce) blocks (904g) full-fat cream cheese, room temperature
1 1/4 cups (250g) granulated sugar
1 cup (240g) full-fat sour cream, room temperature
1/2 cup (120ml) heavy cream, room temperature
4 large eggs, room temperature
2 teaspoons pure vanilla extract
1 vanilla bean, seeds scraped (or substitute with 1 additional teaspoon vanilla extract)
1/4 teaspoon fine sea salt
For the Crème Brûlée Topping:
1/2 cup (100g) granulated sugar (or superfine/caster sugar, for best results)
Fresh berries, for garnish (optional)
Equipment
9-inch springform pan
Stand mixer or hand mixer
Large roasting pan (for water bath)
Kitchen torch
Fine-mesh sieve (optional, for dusting sugar)
Instructions
Step 1: Prepare the Crust & Oven
Preheat your oven to 350°F (177°C). Wrap the outside of your 9-inch springform pan tightly with a double layer of heavy-duty aluminum foil to waterproof it for the water bath.
In a medium bowl, combine the graham cracker crumbs, sugar, and salt. Pour in the melted butter and stir until the mixture resembles wet sand and holds together when pinched.
Press the crumbs firmly and evenly into the bottom and about 1 inch up the sides of the prepared pan. Use the bottom of a flat glass or measuring cup to compact it.
Bake the crust for 10 minutes. Remove and set aside on a wire rack. Reduce oven temperature to 325°F (163°C).
Step 2: Make the Cheesecake Filling
In the bowl of a stand mixer fitted with a paddle attachment (or using a hand mixer), beat the room-temperature cream cheese on medium-low speed until completely smooth and creamy, about 2-3 minutes. Scrape down the bowl and beater.
With the mixer on low, gradually add the sugar. Beat until just combined.
Add the sour cream and heavy cream, mixing on low until incorporated.
Beat in the eggs one at a time, ensuring each is fully blended before adding the next. Stop mixing as soon as the last egg is incorporated. Do not overmix after adding eggs.
Stir in the vanilla extract, vanilla bean seeds, and salt by hand until just combined. The batter should be smooth, thick, and free of lumps.
Step 3: Bake in a Water Bath
Pour the filling over the pre-baked crust. Smooth the top with a spatula.
Place the foil-wrapped springform pan inside a large roasting pan. Carefully pour hot water into the roasting pan until it comes about halfway up the sides of the springform pan.
Bake at 325°F (163°C) for 65-75 minutes. The cheesecake is done when the edges are set but the center still has a slight, gentle wobble—like set Jell-O—when the pan is nudged. The center should not be liquid.
Turn off the oven, crack the door open with a wooden spoon, and let the cheesecake cool in the warm oven for 1 hour. This gradual cooling helps prevent cracking.
Step 4: Chill Thoroughly
Remove the cheesecake from the water bath and place it on a wire rack. Run a thin knife around the edge to loosen it from the pan (this also helps prevent cracking as it contracts).
Allow it to cool to room temperature, about 2 hours. Then, cover loosely and refrigerate for at least 8 hours, preferably overnight. This step is non-negotiable for perfect texture and clean slicing.
Step 5: The Crème Brûlée Topping & Final Assembly
Unmold: Carefully run a knife around the edge again. Release the springform clamp and remove the ring.
Sugar Layer: Just before serving, sprinkle the 1/2 cup of sugar in a thin, even layer over the entire top of the chilled cheesecake. Gently tilt and tap the pan to distribute it evenly. For precision, you can use a fine-mesh sieve to dust the sugar.
Caramelize: Using a kitchen torch, melt the sugar by moving the flame in small, slow circles about 4-5 inches from the surface. Heat until the sugar is fully melted, bubbling, and has turned a deep golden amber. Do not linger in one spot, or you may burn the sugar.
The Crackle: Allow the caramelized sugar to cool and harden for 3-5 minutes. It will form the signature glass-like shell.
Serve: Slice with a sharp, thin-bladed knife that has been run under hot water and wiped dry between each cut. This ensures clean slices through the hard sugar topping. Garnish with fresh berries if desired.
Chef’s Notes & Tips
Room Temperature is Key: Ensuring all dairy and eggs are at room temperature prevents a lumpy batter and ensures even baking.
No Torch? You can use your oven’s broiler. Place the sugared cheesecake on a rack in the upper third of the oven and broil for 2-5 minutes, watching constantly to prevent burning. Let the pan cool completely before broiling to avoid overheating the filling.
Storage: Store leftovers in the refrigerator for up to 5 days. The caramelized topping will soften after a day but will still be delicious.
Make-Ahead: The cheesecake (without the sugar topping) can be made and refrigerated up to 3 days in advance. Caramelize the sugar the day of serving.
Nutrition Information (Per Serving, 1/12 of Cheesecake)
Disclaimer: The following is an approximate estimate calculated from the listed ingredients.
Nutrient Amount % Daily Value*
Calories ~580 kcal
Total Fat 42g 54%
Saturated Fat 24g 120%
Cholesterol 175mg 58%
Sodium 380mg 17%
Total Carbohydrates 45g 16%
Dietary Fiber 0.5g 2%
Sugars 37g
Protein 9g