Preparation Time: 10 minutes
Chilling Time: 2 hours (Minimum) / 4 hours (Ideal)
Total Time: 2 hours 10 minutes
Difficulty Level: Super Easy (1 out of 5)
Yield: 2 servings (as a dessert) or 1 large serving (as a meal replacement)
The Flavor Intensity Guide
To help you tailor this pudding to your specific cravings, I have broken down the “intensities” of the key ingredients. This allows you to dial up or down the flavors based on your preference.
Chocolate Intensity (Moderate to High):
The Base: Using 2 tablespoons of unsweetened cocoa powder provides a deep, dark chocolate flavor that isn’t overly sweet. If you prefer a “milk chocolate” vibe, reduce the cocoa to 1.5 tablespoons and add an extra teaspoon of maple syrup.
The Boost: For an intense “dark chocolate 70%” experience, add a pinch of instant espresso powder (it doesn’t make it taste like coffee; it amplifies the chocolate).
Cinnamon Intensity (Warm & Aromatic):
The Base: ½ teaspoon of ground cinnamon offers a classic, comforting warmth.
The Boost: If you are a cinnamon enthusiast, swap the standard cassia cinnamon for Ceylon cinnamon (which is sweeter and more delicate) and increase the amount to ¾ teaspoon for a spicy kick that lingers on the palate.
Sweetness Intensity (Balanced):
The Base: 2 tablespoons of maple syrup create a nuanced sweetness that caramelizes the cocoa.
The Swap: For a caramel-like intensity, use date syrup. For a lower glycemic option, use monk fruit sweetener (adjust to taste, as it is much sweeter than sugar).
Creaminess Intensity (Silky Smooth):
The Base: Full-fat coconut milk creates the creamiest, richest texture.
The Light Option: Almond milk or oat milk will yield a lighter, thinner pudding that is more “refreshing” than “decadent.”
Ingredients
This recipe uses clean, whole-food ingredients to fuel your body without compromising on taste.
For the Pudding Base
¼ cup (40g) Chia seeds (White or black; both work, but white show the chocolate color better)
2 tablespoons Unsweetened Dutch-processed cocoa powder (or regular unsweetened)
½ teaspoon Ground cinnamon (preferably Ceylon)
1 ½ cups (360ml) Unsweetened almond milk or full-fat coconut milk (your choice based on the intensity guide above)
2 tablespoons Maple syrup (or honey)
½ teaspoon Vanilla extract
Pinch of Sea salt (This is non-negotiable; it enhances the chocolate flavor significantly)
For the Luxurious Topping (The “Last of the Recipe”)
This is the “Final Touch” that elevates this from a simple snack to a gourmet experience.
Coconut whipped cream (store-bought or homemade)
1 teaspoon Cacao nibs (for crunch)
1 pinch of ground cinnamon (for garnish)
A drizzle of melted dark chocolate (optional, for extra indulgence)
Instructions: The “Wait and Whisk” Method
Step 1: The Dry Mix
In a medium-sized mixing bowl, combine the chia seeds, cocoa powder, ground cinnamon, and sea salt. Whisk these dry ingredients vigorously to ensure there are no lumps of cocoa powder. This step is crucial; if the cocoa is clumpy, your pudding will have bitter pockets of dry powder rather than a smooth texture.
Step 2: The Wet Incorporate
Pour in the almond milk (or coconut milk), maple syrup, and vanilla extract.
Step 3: The First Whisk (Intensity 1)
Whisk the mixture like your life depends on it for about 1 to 2 minutes. You will see the liquid start to thicken almost immediately as the chia seeds begin to absorb the moisture. Make sure to scrape the bottom and sides of the bowl to catch any stray chia seeds.
Step 4: The “Wait 10” Rest
Set a timer for 10 minutes. This is the most important step for texture. Let the mixture sit on the counter for 10 minutes.
Step 5: The Second Whisk (Intensity 2)
After 10 minutes, whisk the pudding again very thoroughly for another 30 seconds. You will notice it has significantly thickened. This second whisk breaks up any clumps of chia seeds that may have formed and ensures an even consistency throughout. If you skip this step, you will end up with a seed-heavy bottom and a liquid top.
Step 6: The “Long Wait” Chilling
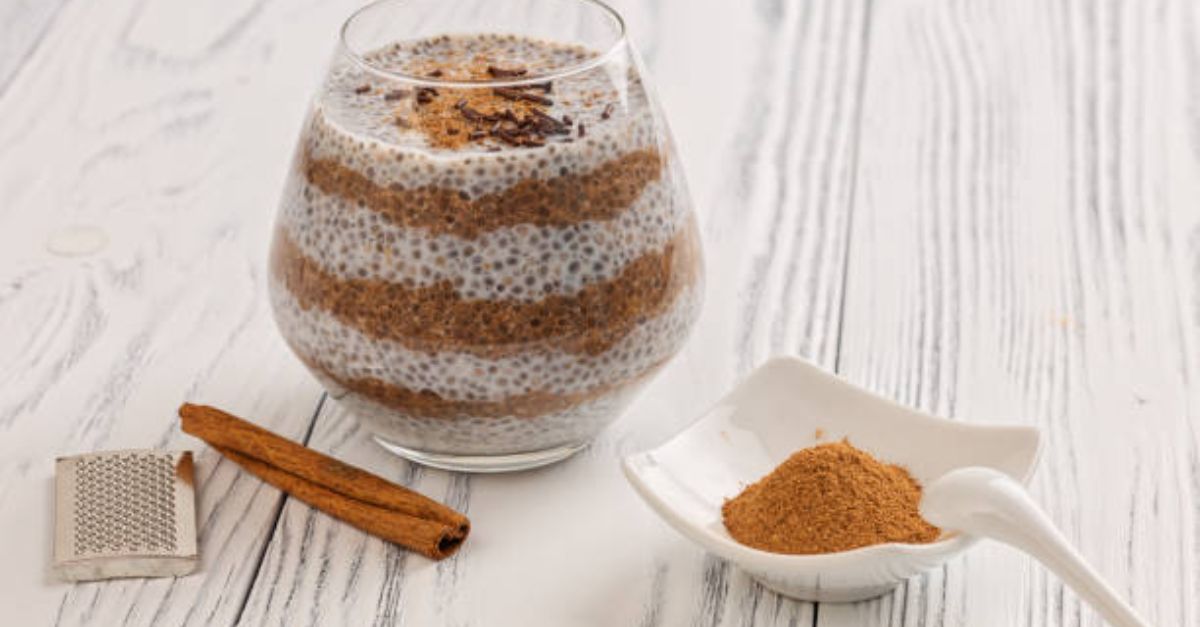
Divide the pudding mixture evenly into two serving glasses or jars (like mason jars). Seal them with a lid or plastic wrap.
Place the jars in the refrigerator for at least 2 hours. However, I highly recommend the 4-hour mark for the best texture. The pudding is ready when it has reached a thick, custard-like consistency that wobbles slightly when shaken.
The “Last of the Recipe” – The Finishing Touch
The pudding is “done” after chilling, but the experience of eating it is perfected with the toppings. This is the “Last of the Recipe” technique that I always recommend.
The Temperature Trick: The fridge-cold pudding is fantastic, but for an elevated experience, let it sit at room temperature for 5 minutes before serving. This takes the “chill” off and allows the flavors of the chocolate and cinnamon to bloom and become more aromatic.
The Assembly:
Top the chilled pudding with a generous dollop of coconut whipped cream.
Sprinkle the cacao nibs over the top for a bitter crunch that contrasts the creamy pudding.
Dust with a final pinch of ground cinnamon.
For a dramatic finish, drizzle a thin stream of melted dark chocolate over the top. It will harden slightly against the cold pudding, creating a chocolate shell effect.
Nutrition Information (Per Serving)
Please note: Nutritional values are estimates based on using unsweetened almond milk and 2 tablespoons of maple syrup. Values will vary based on specific brands and milk choices.
Nutrient Amount per Serving
Calories 220 kcal
Total Fat 12g
Saturated Fat 1.5g
Cholesterol 0mg
Sodium 180mg
Total Carbohydrates 24g
Dietary Fiber 11g
Total Sugars 12g
Protein 6g
Calcium 350mg (High)
Iron 3mg (High)
Omega-3 Fatty Acids 5g (Excellent)