Prep Time: 20 minutes (plus 1 hour resting time)
Cook Time: 20 minutes
Total Time: 1 hour 40 minutes
Difficulty Level: Intermediate
Intensity: Moderate, hands-on frying required
There’s something magical about the perfect chalupa shell—it’s not quite a taco, not quite a fry bread, but a glorious hybrid that’s simultaneously crispy, chewy, and sturdy enough to hold a mountain of toppings. While often associated with fast food, the homemade version is a revelation. This recipe guides you through creating authentic, deeply satisfying chalupa shells from scratch. The process is a rewarding kitchen project, resulting in shells that are far superior in flavor and texture to anything you can buy.
The Story Behind the Shell
The chalupa, meaning “boat” or “canoe” in Spanish, gets its name from its distinctive curved shape. Originating in the cuisine of Mexico, particularly the states of Puebla, Oaxaca, and Guerrero, the base is a masa dough that’s pressed thin, fried until puffy, and then shaped. This homemade version captures that essential character: a crisp exterior giving way to a soft, tender interior, perfect for cradling your favorite fillings.
Ingredients
2 cups (250g) masa harina (instant corn masa flour)
1 ¼ cups (300ml) warm water
½ teaspoon baking powder
1 teaspoon salt
¼ cup (30g) all-purpose flour (for dusting and texture)
1 ½ – 2 quarts (1.5-2 L) neutral oil for frying (such as vegetable, canola, or peanut)
Optional for flavor: 1 teaspoon onion powder or garlic powder
Equipment Needed: Large mixing bowl, plastic wrap, heavy skillet or cast-iron pan, metal tongs, paper towels, a clean kitchen towel, and a weight for shaping (like a small, flat-bottomed bowl or a chalupa press lined with parchment).
Step-by-Step Instructions
Step 1: Make & Rest the Dough
In a large mixing bowl, whisk together the masa harina, baking powder, salt, and any optional dried spices. Gradually add the warm water, mixing with your hands or a wooden spoon until a shaggy dough forms. Knead the dough in the bowl for 3-4 minutes until it is very smooth, pliable, and holds together without cracking at the edges. If it feels too dry, add more water, one tablespoon at a time. If it’s sticky, dust with a bit more masa harina.
Once kneaded, cover the bowl tightly with plastic wrap and let the dough rest at room temperature for 1 hour. This critical step allows the masa to fully hydrate, making the dough easier to press and resulting in a more tender final shell.
Step 2: Divide & Shape
After resting, divide the dough into 8 equal portions (about 50g each). Roll each portion into a smooth ball. Keep the balls covered with a damp kitchen towel to prevent drying.
Lightly dust a clean surface with the all-purpose flour. Flatten one dough ball into a small disc, then roll it out into a thin oval, about 6 inches long and ¼ inch thick. Don’t worry about perfection—rustic edges add charm. Repeat with the remaining balls, stacking them between sheets of parchment paper to prevent sticking.
Step 3: Fry & Form the Shells (The Key Step!)
This is the most active part of the process. Please exercise caution with hot oil.
Heat the Oil: In a heavy, deep skillet or Dutch oven, heat 1 ½ inches of oil over medium-high heat to 365°F (185°C). Use a deep-fry or candy thermometer for accuracy. The oil should bubble actively when a small piece of dough is added.
First Fry (Puffing): Carefully slide one rolled dough oval into the hot oil. It should sink and then immediately begin to bubble vigorously. Fry for 30-45 seconds until the bottom is set and lightly golden.
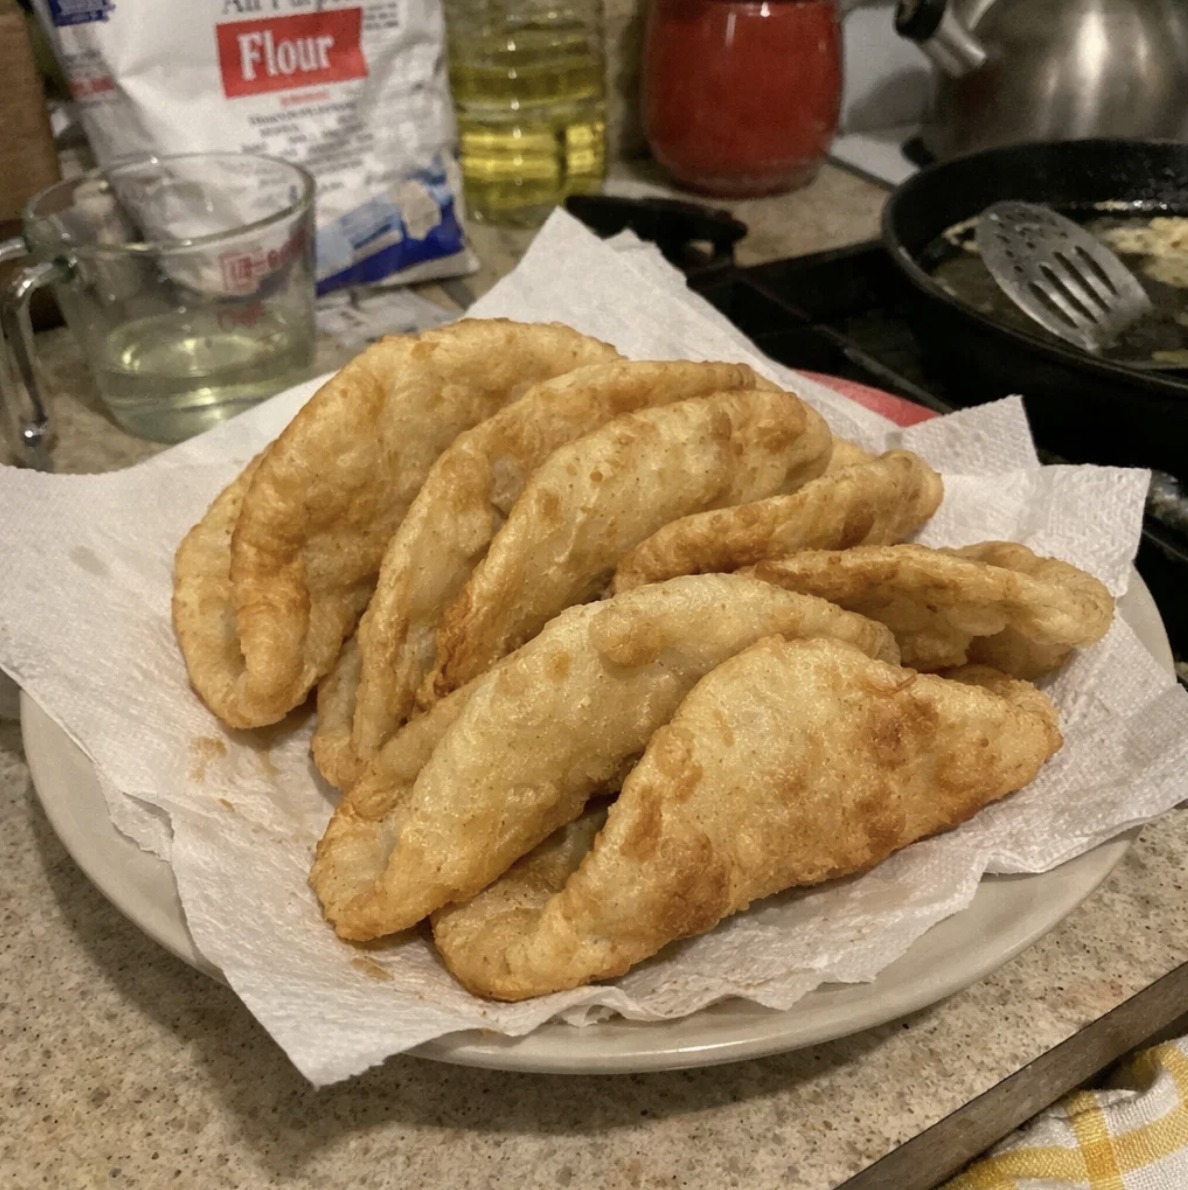
Shape the “Boat”: Using metal tongs, gently but firmly flip the shell. Immediately, use the tongs and a sturdy, heat-proof slotted spoon or a second set of tongs to bend the shell into a U-shape or cradle. Hold it in this curved position for 15-20 seconds until it sets. This creates the classic “chalupa” shape.
Second Fry (Crisping): Release the shaped shell back into the oil. Continue frying, turning occasionally, for another 1 to 1 ½ minutes total, until it is uniformly golden brown, crisp, and puffy in spots.
Drain: Transfer the finished shell to a wire rack set over a baking sheet or a plate lined with paper towels. Let the excess oil drain off.
Repeat the process with the remaining dough, adjusting the heat as needed to maintain the 365°F temperature. Frying one at a time ensures proper shaping and even cooking.
Step 4: Serve Immediately & Top!
Chalupa shells are best enjoyed fresh and hot. While they can be kept warm in a 200°F (95°C) oven for a short time, they truly shine straight from the fryer.
Traditional Topping Suggestion:
Create a “Chalupa Supreme” by spreading a layer of refried beans inside the warm shell, then topping with seasoned ground beef or shredded chicken, shredded lettuce, diced tomatoes, a sprinkle of shredded cheddar or cotija cheese, and a dollop of cool sour cream or Mexican crema.
Nutrition Information (Per 1 Chalupa Shell, without toppings)
Calories: ~180 kcal
Total Fat: 7g
Saturated Fat: 0.5g
Trans Fat: 0g
Cholesterol: 0mg
Sodium: 300mg
Total Carbohydrates: 26g
Dietary Fiber: 3g
Sugars: 0g
Protein: 3g