Prep Time: 15 minutes
Cook Time: 50–60 minutes
Cooling Time: 30 minutes
Total Time: 1 hour 35 minutes
Intensity: Easy to Moderate
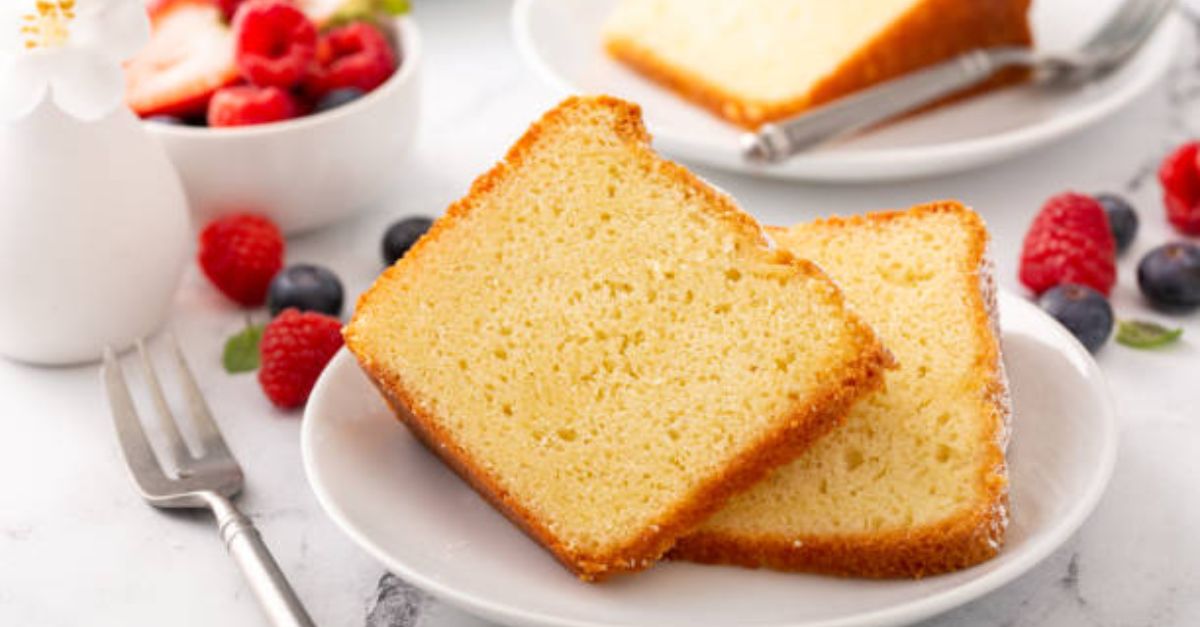
There is something profoundly comforting about a classic pound cake. Traditionally, the name “pound cake” comes from the original recipe: one pound each of butter, sugar, eggs, and flour. While delicious, that version can be dense, heavy, and—let’s be honest—calorically daunting.
This Classic Vanilla Yogurt Pound Cake takes the soul of that tradition but lightens it beautifully. By incorporating tangy whole-milk yogurt, we achieve a crumb that is exceptionally moist, tender, and fine-grained, while the generous amount of vanilla bean paste (or good quality extract) infuses every bite with a warm, aromatic sweetness. The yogurt adds a subtle tang that balances the richness, preventing the cake from tasting cloying.
This is the perfect dessert for a spring brunch, a summer berry shortcake base, or simply a slice alongside your afternoon coffee. It requires no fancy equipment—just a loaf pan, a mixing bowl, and a little patience for the butter to come to room temperature. The result is a golden-crusted, perfectly domed loaf that will earn a permanent spot in your baking repertoire.
Ingredients
For the Cake:
1 ½ cups (190g) all-purpose flour
2 teaspoons baking powder
½ teaspoon fine sea salt
1 cup (226g) unsalted butter, softened to room temperature
1 ¼ cups (250g) granulated sugar
3 large eggs, at room temperature
½ cup (120g) plain whole-milk yogurt, at room temperature
1 tablespoon vanilla bean paste (or 1 ½ tablespoons pure vanilla extract)
For the Vanilla Glaze (Optional):
1 cup (120g) powdered sugar, sifted
2–3 tablespoons milk or heavy cream
¼ teaspoon vanilla extract
Pinch of salt
Instructions
Phase 1: Preparation (Intensity: Easy)
Preheat & Prepare: Preheat your oven to 325°F (163°C). This slightly lower temperature is key to baking a pound cake; it allows the interior to cook through evenly without the outside browning too quickly. Grease a 9×5-inch loaf pan thoroughly with butter or baking spray, then dust it lightly with flour. Tap out any excess flour. For guaranteed release, you can also line the bottom with a strip of parchment paper, leaving an overhang on the long sides to act as handles.
Combine Dry Ingredients: In a medium bowl, whisk together the all-purpose flour, baking powder, and salt. Whisking aerates the flour and ensures the leavening agent is evenly distributed, which prevents uneven rising. Set this bowl aside.
Phase 2: The Creaming Method (Intensity: Moderate)
Cream Butter and Sugar: In a large mixing bowl (or the bowl of a stand mixer fitted with the paddle attachment), beat the softened butter on medium speed for 2–3 minutes until it is pale, creamy, and fluffy. Do not rush this step. Properly creamed butter is the foundation of a tender crumb. Add the granulated sugar and continue beating for another 3–4 minutes, stopping to scrape down the sides and bottom of the bowl halfway through. The mixture should look light in color and feel gritty but fluffy.
Incorporate Eggs: Add the eggs one at a time, beating well after each addition. Beat for about 1 minute per egg. This emulsification process traps air and creates structure. If the mixture looks curdled or separated, don’t panic—add a tablespoon of your measured flour to help bring it back together. Scrape down the bowl again.
Phase 3: The Alternating Fold (Intensity: Moderate)
Alternate Dry and Wet: This is the most critical step for a tender cake. Reduce your mixer speed to low. Add one-third of the dry ingredients to the butter mixture, mixing just until combined. Add half of the yogurt and the vanilla bean paste, mixing until just incorporated. Repeat: add another third of the dry ingredients, then the remaining yogurt, and finally the last of the dry ingredients. Mix until the flour just disappears. Over-mixing at this stage will develop gluten, resulting in a tough, rubbery cake.
Finish by Hand: Remove the bowl from the mixer and use a silicone spatula to give the batter a few final folds from the bottom up. This ensures there are no hidden pockets of flour or butter.
Phase 4: Baking & Cooling (Intensity: Easy)
Bake: Pour the thick, velvety batter into the prepared loaf pan and smooth the top with your spatula. For a classic, evenly cracked top, you can run a small knife through the center of the batter lengthwise to encourage the crust to split cleanly. Bake on the center rack for 50–60 minutes. The cake is done when a wooden skewer inserted into the deepest part of the cake comes out clean or with just a few moist crumbs attached. The top should be a deep golden brown.
Cool: Let the cake cool in the pan on a wire rack for 20 minutes. This allows the structure to set. After 20 minutes, gently turn the cake out onto the rack to cool completely. If you used a parchment sling, simply lift the cake out. Do not glaze a warm cake; the glaze will become runny and absorb unevenly.
Finishing Touches
Make the Glaze (Optional): In a small bowl, whisk together the powdered sugar, 2 tablespoons of milk, vanilla extract, and a pinch of salt. If the glaze is too thick, add the remaining milk a teaspoon at a time until it reaches a thick but pourable consistency (it should slowly ribbon off the whisk). Once the cake is completely cool, drizzle the glaze over the top, letting it cascade down the sides.
Nutrition Information
*Serving size is based on 1 slice (1/10 of the cake without glaze).*
Nutrient Amount
Calories 365 kcal
Total Fat 18g
Saturated Fat 11g
Cholesterol 95mg
Sodium 210mg
Total Carbohydrates 46g
Dietary Fiber 0.5g
Total Sugars 30g
Protein 5g