Prep Time: 45 minutes
Cook Time: 25-30 minutes (for brownies)
Cooling Time: 1 hour
Total Time: 2 hours 15 minutes (plus optional overnight chilling)
Intensity: Medium. The recipe requires several steps (baking brownies, making mousse, whipping cream), but none of the steps are technically difficult. It’s more about time and assembly than skill.
Yield: 12-16 servings
Ingredients
For the Fudgy Brownies:
1 cup (2 sticks) unsalted butter
2 ¼ cups granulated sugar
4 large eggs
1 ½ teaspoons vanilla extract
1 cup unsweetened cocoa powder
1 cup all-purpose flour
½ teaspoon salt
½ teaspoon baking powder (optional, for a slightly cakier texture, omit for extra fudgy)
For the No-Cook Chocolate Mousse Layer:
2 cups cold heavy cream, divided
1 ½ cups semi-sweet chocolate chips (about 9 oz)
¼ cup powdered sugar
1 teaspoon vanilla extract
For the No-Bake Cheesecake Layer:
16 oz (two 8 oz blocks) full-fat cream cheese, softened
1 cup powdered sugar
1 teaspoon vanilla extract
1 ½ cups cold heavy cream
For Assembly & Topping:
1 ½ cups cold heavy cream
¼ cup powdered sugar
1 teaspoon vanilla extract
1 jar (about 12 oz) hot fudge sauce, warmed for drizzling
Optional garnishes: Chocolate shavings, chocolate curls, mini chocolate chips, fresh raspberries, or toffee bits.
Instructions
Part 1: Bake the Brownies (Intensity: Easy)
Preheat & Prep: Preheat your oven to 350°F (175°C). Grease a 9×13-inch baking pan or line it with parchment paper for easy removal.
Melt Butter: In a large microwave-safe bowl, melt the butter in 30-second increments until fully melted.
Combine Wet Ingredients: Whisk the sugar into the hot melted butter until combined. Let the mixture cool for a minute, then whisk in the eggs one at a time, followed by the vanilla extract. The mixture should be smooth and glossy.
Add Dry Ingredients: Sift or whisk the cocoa powder, flour, and salt together in a separate bowl to remove any lumps. Gradually add the dry ingredients to the wet ingredients, folding with a spatula until just combined. Be careful not to overmix. If using, fold in the baking powder now.
Bake: Pour the thick batter into the prepared pan and spread it evenly. Bake for 25-30 minutes, or until a toothpick inserted into the center comes out with a few moist crumbs (not wet batter). The edges will look set.
Cool Completely: Place the pan on a wire rack and let the brownies cool completely to room temperature. For best results, you can even pop them in the fridge to speed this up. Once cool, cut them into 1-inch cubes.
Part 2: Make the Chocolate Mousse Layer (Intensity: Easy)
Melt Chocolate: Place the chocolate chips in a medium, heat-safe bowl. Heat ½ cup of the heavy cream in a small saucepan or in the microwave until it’s just simmering (hot but not boiling). Pour the hot cream over the chocolate chips. Let it sit for 2-3 minutes, then whisk slowly until the chocolate is completely melted and the mixture is smooth and glossy. Set aside to cool to room temperature.
Whip Cream: In a large, chilled bowl, use an electric mixer to beat the remaining 1 ½ cups of cold heavy cream, powdered sugar, and vanilla extract until stiff peaks form.
Fold Together: Take about ⅓ of the whipped cream and stir it into the cooled chocolate mixture to lighten it. Then, gently fold the lightened chocolate mixture back into the remaining whipped cream until no white streaks remain. Be careful not to deflate the cream. Set aside.
Part 3: Make the No-Bake Cheesecake Layer (Intensity: Easy)
Beat Cream Cheese: In a large bowl, beat the softened cream cheese with an electric mixer until it’s completely smooth and free of lumps.
Add Sugar & Vanilla: Add the powdered sugar and vanilla extract and beat until well combined and creamy. Scrape down the sides of the bowl as needed.
Whip and Fold: In a separate, clean, chilled bowl, beat the 1 ½ cups of cold heavy cream until stiff peaks form.
Combine: Gently fold the whipped cream into the cream cheese mixture in two additions until the mixture is light, fluffy, and well combined. Set aside.
Part 4: Make the Whipped Topping (Intensity: Easy)
In a large, chilled bowl, combine the 1 ½ cups of cold heavy cream, powdered sugar, and vanilla extract.
Beat with an electric mixer on medium-high speed until stiff peaks form. Be careful not to over-whip into butter.
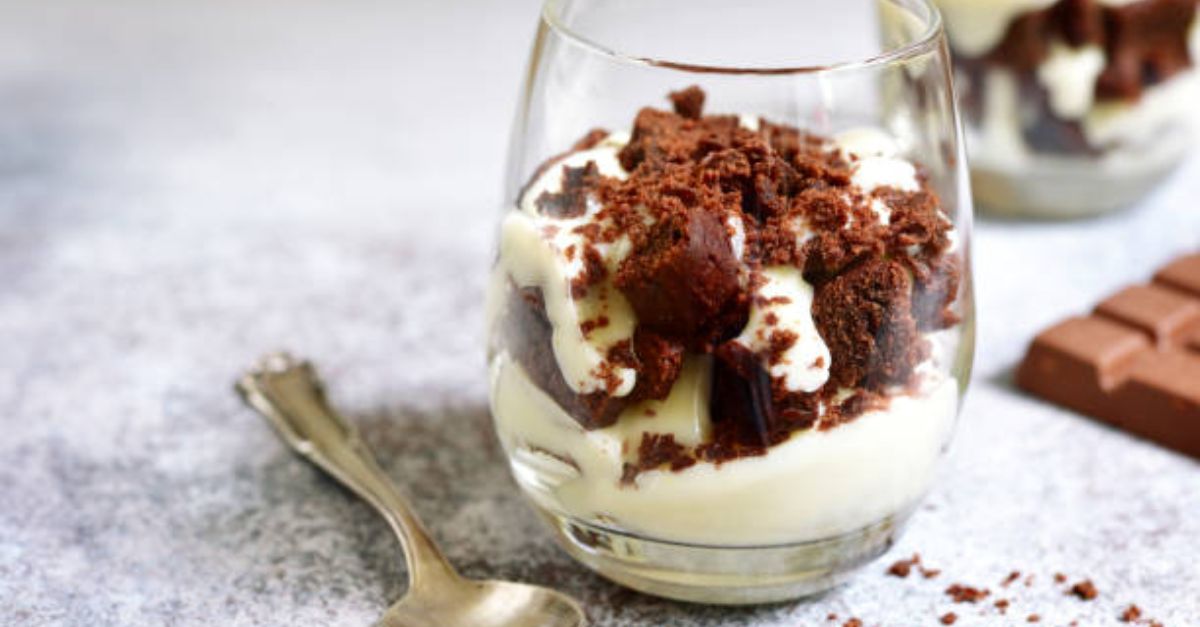
Part 5: Assemble the Trifle (Intensity: Easy – The Fun Part!)
Get out your large glass trifle bowl (at least 4-quart capacity). You will be building two layers of each component.
First Brownie Layer: Place half of the brownie cubes in an even layer at the bottom of the bowl.
First Fudge Drizzle: Drizzle about ⅓ of your warmed hot fudge sauce generously over the brownies. The warmth helps it seep into the cubes a little.
First Mousse Layer: Gently spread half of the chocolate mousse over the brownie layer. Use a spatula to create an even layer, letting it reach the edges of the glass so the color shows through.
First Cheesecake Layer: Carefully spread half of the no-bake cheesecake layer over the chocolate mousse.
Second Brownie Layer: Top with the remaining brownie cubes.
Second Fudge Drizzle: Drizzle another ⅓ of the hot fudge sauce over the second brownie layer.
Second Mousse Layer: Gently spread the remaining chocolate mousse over the brownies.
Second Cheesecake Layer: Top with the remaining no-bake cheesecake layer.
Final Topping: Spread or pipe the freshly whipped cream over the top layer. You can make it smooth or create decorative peaks with a spatula or piping bag.
Final Drizzle & Garnish: Drizzle the remaining warm fudge sauce artfully over the whipped cream. Finish with your chosen garnishes—chocolate shavings, curls, or a sprinkle of mini chocolate chips look fantastic.
Serving and Storage
Chill: For the best flavor and texture, cover the trifle loosely with plastic wrap and refrigerate for at least 4 hours, or preferably overnight. This allows the layers to set and the flavors to meld beautifully.
Serve: Scoop deep into the bowl to ensure everyone gets a bit of every layer in their serving. Use a large spoon or a clear glass ladle.
Storage: Cover any leftovers tightly with plastic wrap and store them in the refrigerator for up to 3 days. The brownies will continue to soften, creating an even more decadent, almost cake-like texture.
Nutrition Information
(Please note: The following is an estimate calculated using standard ingredient databases and is for informational purposes only. Actual values may vary based on specific brands, ingredients, and portion sizes. For the most accurate information, you should calculate using the specific products you use.)
Serving Size: 1 serving (based on 16 servings)
Calories: 710
Total Fat: 48g
Saturated Fat: 29g
Cholesterol: 190mg
Sodium: 280mg
Total Carbohydrates: 65g
Dietary Fiber: 3g
Total Sugars: 52g
Protein: 9g