Prep Time: 30 minutes (active)
Rise Time: 2 hours (mostly hands-off)
Bake Time: 30 minutes
Total Time: 3 hours
Yield: 2 perfect loaves
Skill Level: Beginner-Friendly
Intensity: Low to Moderate (Requires patience, not complex skill)
A Note on This Timeless Recipe
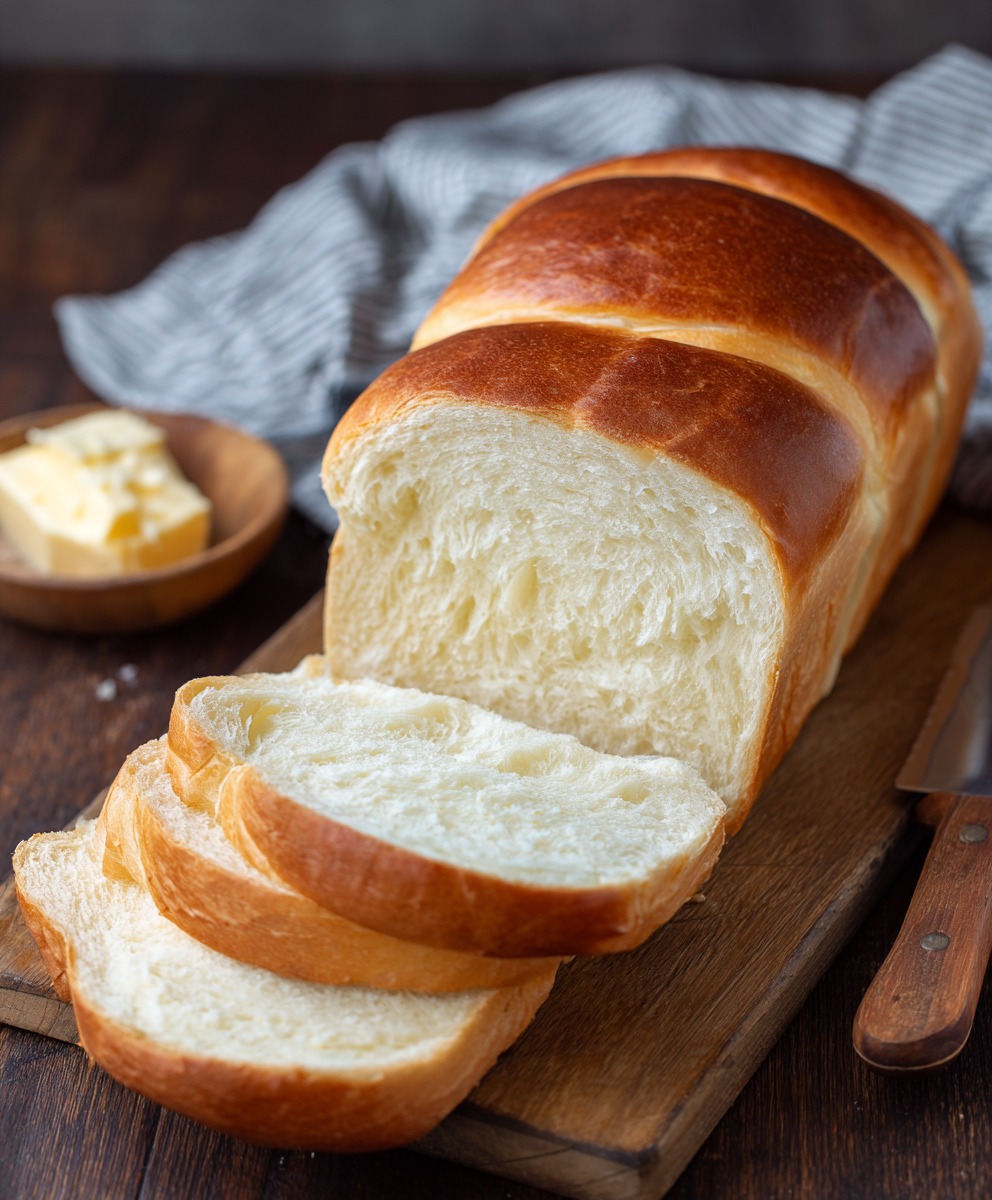
There is a profound comfort in the simplicity of Amish white bread. This recipe produces loaves that are the very definition of old-fashioned goodness: a crust that’s tender and golden, giving way to a soft, pillowy, and slightly sweet interior. It’s the bread of childhood memories, perfect for sandwiches, toast, or simply slathered with fresh butter. Unlike artisanal sourdough, this recipe is approachable and reliable, using common ingredients to create something truly extraordinary. The process is a gentle lesson in patience, as you nurture the dough through two rises, filling your kitchen with that irreplaceable, anticipatory aroma of baking bread.
Ingredients
2 cups warm water (110°F/45°C – comfortably warm to the touch, not hot)
2/3 cup white granulated sugar
1 ½ tablespoons active dry yeast (or 2 packets)
¼ cup neutral oil (like vegetable, canola, or melted coconut oil)
1 ½ teaspoons salt
6 – 6 ½ cups all-purpose flour, divided (plus extra for dusting)
1-2 tablespoons butter, melted (for brushing the baked loaves)
Equipment
Large mixing bowl (or stand mixer with dough hook)
Measuring cups and spoons
Wooden spoon or rubber spatula
Clean kitchen towel or plastic wrap
2 x 9×5 inch loaf pans
Pastry brush
Instructions
Step 1: Awaken the Yeast (10 minutes)
In your large mixing bowl, combine the warm water and sugar. Stir until the sugar mostly dissolves. Sprinkle the yeast evenly over the surface. Let it stand for 5-10 minutes. The mixture will become frothy, bubbly, and creamy—this “blooming” process confirms your yeast is active and ready to work its magic.
Step 2: Create the Dough (10 minutes)
To the yeasty water, add the oil, salt, and 3 cups of the flour. Stir vigorously with a wooden spoon for 2-3 minutes until a smooth, sticky batter forms. This develops initial gluten.
Begin adding the remaining flour, ½ cup at a time, stirring until the dough starts to pull away from the sides of the bowl and becomes difficult to stir.
Turn the dough out onto a lightly floured surface. Knead for 8-10 minutes, incorporating just enough of the remaining flour to prevent sticking. The dough is ready when it is smooth, elastic, and slightly tacky but not sticky. It should spring back slowly when you gently poke it. *(Stand Mixer Method: Use the dough hook on low speed, adding flour until the dough cleans the sides of the bowl. Knead on medium-low for 5-7 minutes.)*
Step 3: First Rise – Let it Rest (1 hour)
Place the kneaded dough in a large, lightly oiled bowl. Turn it once to coat the entire surface with a thin film of oil. This prevents a skin from forming. Cover the bowl with a damp kitchen towel or plastic wrap.
Place it in a warm, draft-free spot (like an oven with the light on, but turned off). Let it rise until doubled in size, about 1 hour. This slow fermentation builds flavor and texture.
Step 4: Shape the Loaves (10 minutes)
Punch down the risen dough firmly with your fist to release the air. Turn it out onto a clean surface and divide it into two equal portions.
Shape each portion into a loaf: flatten into a rectangle about 9 inches wide, then tightly roll it up from the short end, pinching the seam and ends to seal. Place each loaf, seam-side down, into two greased 9×5 inch loaf pans.
Step 5: Second Rise – The Final Proof (45-60 minutes)
Cover the pans again with your towel and return to the warm spot. Let the loaves rise until they crest about 1-2 inches above the rim of the pans, becoming puffy and full. This second, shorter rise gives the bread its final, light texture.
Step 6: Bake to Golden Perfection (30 minutes)
While the dough proofs, preheat your oven to 350°F (175°C). Once risen, place the pans in the center of the oven. Bake for 27-32 minutes. The loaves are done when they are deep golden brown on top and sound hollow when tapped on the bottom. An instant-read thermometer inserted into the center should read 190-200°F (88-93°C).
Step 7: The Crucial Finish
Immediately upon removing the bread from the oven, brush the tops with melted butter. This gives the crust a beautiful sheen, added flavor, and keeps it soft.
Let the loaves cool in their pans for 5 minutes, then turn them out onto a wire rack to cool completely (at least 1 hour). Resist the urge to slice while warm! Cutting into hot bread releases steam and can make the interior gummy.
Tips for Success & Variations
Yeast is Key: Ensure your water is the correct temperature. Too hot will kill the yeast; too cold will stall it.
Flour Variances: Humidity and brand affect flour. Use the 6-6 ½ cup measure as a guide, stopping when the dough is smooth and elastic.
Kneading is Therapy: Proper kneading develops the gluten network essential for that perfect, soft structure.
Variations: Add 1-2 teaspoons of cinnamon to the dough for a sweet twist. Or, knead in 1 cup of raisins after the first rise for a classic raisin bread.
Nutrition Information (Per Slice, 1/16th of a loaf)
Please note: Nutritional values are estimates and will vary based on specific ingredients used.
Calories: ~180
Total Fat: 3.5g
Saturated Fat: 0.5g
Cholesterol: 0mg
Sodium: 220mg
Total Carbohydrates: 33g
Dietary Fiber: 1g
Sugars: 5g
Protein: 4g