Prep Time: 30 minutes (plus 10 days for starter fermentation)
Cook Time: 1 hour
Total Time: 10 days, 1 hour 30 minutes (active time is minimal)
Yield: 2 loaves
Skill Level: Beginner to Intermediate (requires attention to a schedule)
Intensity: Low to Medium effort spread over 10 days. The process is simple but requires daily “attention” (mixing) for the starter.
The 10-Day Amish Friendship Bread Starter
Ingredients:
1 cup all-purpose flour
1 cup granulated sugar
1 cup whole milk
Equipment:
1-gallon zip-top bag (or a large glass bowl with a loose lid/plastic wrap)
Wooden or silicone spoon (avoid metal when stirring if using a bowl)
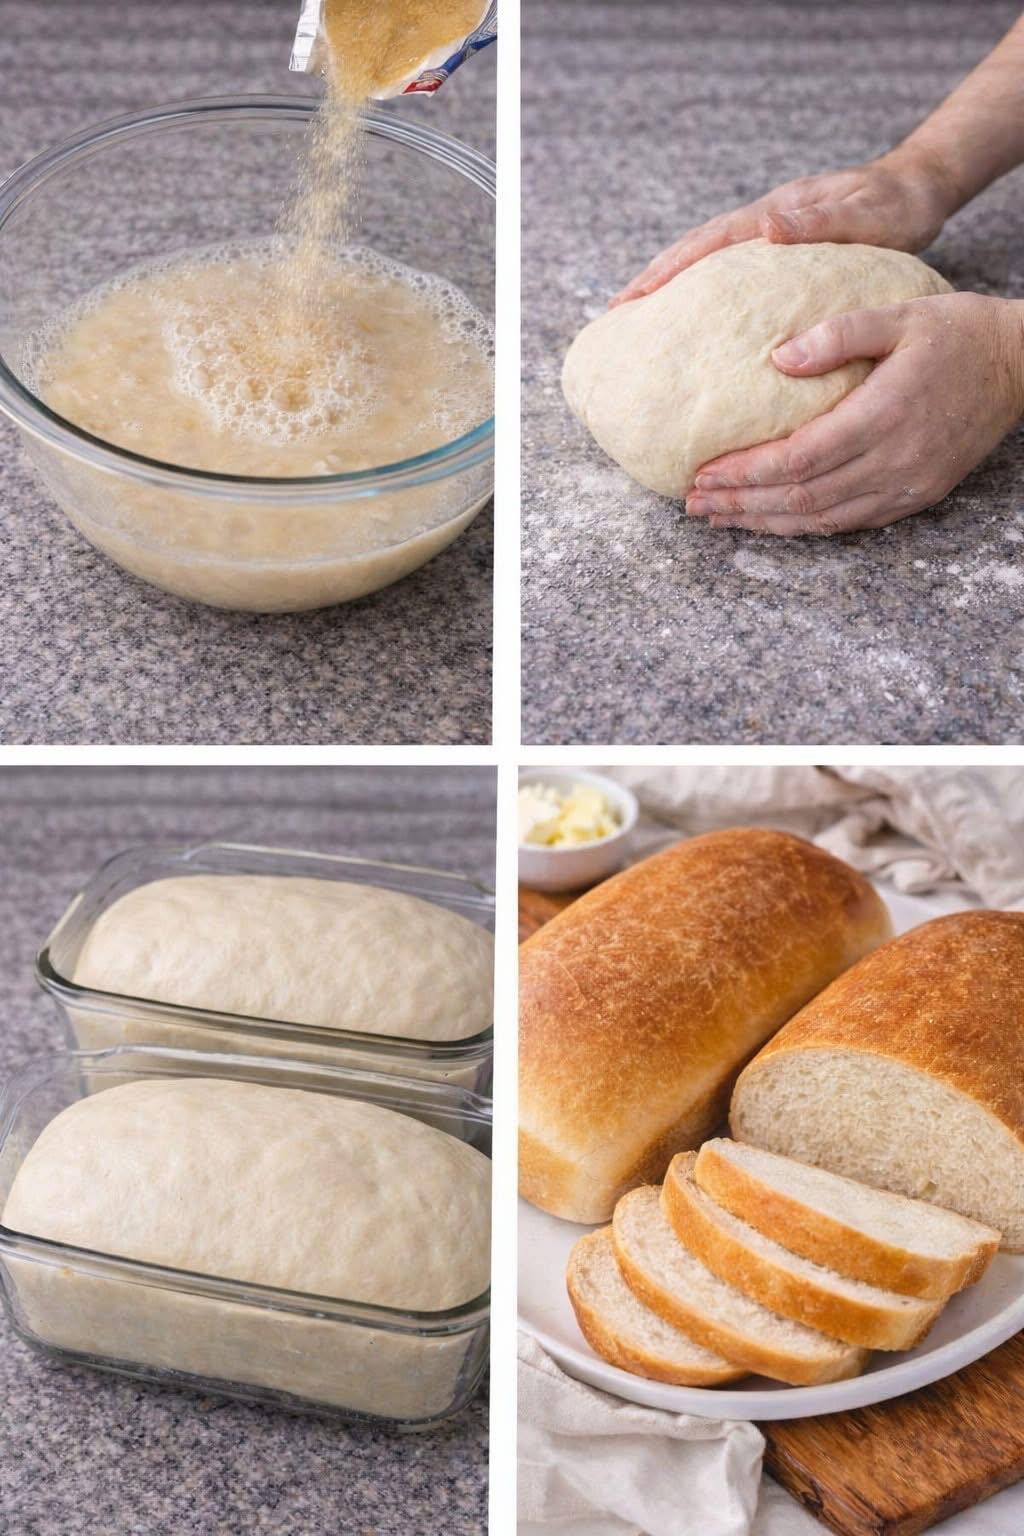
Day 1: In a clean, non-metallic bowl, combine the flour, sugar, and milk. Stir with a wooden spoon until just combined (it will be lumpy). Place the mixture in the gallon zip-top bag or a glass bowl. If using a bowl, cover loosely. Do not refrigerate. Let it sit at room temperature. This is Day 1. Write the date on the bag with a marker.
Days 2, 3, & 4: Mush the bag thoroughly each day to incorporate air, or stir the mixture in the bowl. This is your only task!
Day 5: Add 1 cup of flour, 1 cup of sugar, and 1 cup of milk to the bag/bowl. Mix well by mushing or stirring.
Days 6, 7, 8, & 9: Continue to mush the bag or stir the mixture once each day.
Day 10: Congratulations! Your starter is now active, bubbly, and ready to bake with. Proceed to the bread recipe below.
Important Notes: If you keep your starter in a bag, it may puff up with gas; simply burp it by opening the seal slightly. If at any point the mixture develops an off-color (grey, pink) or a foul odor (beyond a yeasty, sweet smell), discard it and start over.
Amish Friendship Bread (Baking Day)
Ingredients:
For the Bread:
The prepared Amish Bread Starter (from above)
1 cup vegetable oil (or unsweetened applesauce for a lighter version)
1 cup granulated sugar
3 large eggs
1 tsp vanilla extract
2 cups all-purpose flour
1 ½ tsp baking powder
½ tsp baking soda
½ tsp salt
2 tsp ground cinnamon
1 cup chopped nuts (walnuts or pecans, optional)
1 cup raisins or chocolate chips (optional)
For the Cinnamon-Sugar Coating:
½ cup granulated sugar
1 ½ tsp ground cinnamon
Equipment:
2 (9×5 inch) loaf pans
Non-stick cooking spray or butter for greasing
Large mixing bowl
Small bowl
Measuring cups and spoons
Instructions
1. Prepare the Pans & Oven:
Preheat your oven to 325°F (165°C). Generously grease two 9×5 inch loaf pans with non-stick spray or butter. In the small bowl, mix together the ½ cup sugar and 1 ½ tsp cinnamon for the coating. Sprinkle a generous amount (about 2-3 tablespoons total) into the bottom and up the sides of the greased pans, reserving the rest for the batter. This creates the signature sugary crust.
2. Combine the Wet Ingredients:
In your large mixing bowl, pour in your prepared starter. Add the vegetable oil (or applesauce), 1 cup sugar, eggs, and vanilla extract. Beat with a whisk or mixer on medium speed until well combined and smooth.
3. Combine the Dry Ingredients:
In a separate bowl, whisk together the 2 cups of flour, baking powder, baking soda, salt, and 2 tsp of cinnamon. This ensures even distribution of the leavening agents.
4. Make the Batter:
Gradually add the dry ingredient mixture to the wet ingredients, stirring by hand until just combined—do not overmix. A few lumps are okay. Gently fold in the optional nuts, raisins, or chocolate chips, if using.
5. Layer and Bake:
Divide half of the batter evenly between the two prepared pans. Sprinkle some of the reserved cinnamon-sugar mixture over the batter in each pan. Top with the remaining batter, then finish with a final, generous sprinkling of the cinnamon-sugar.
Place the pans in the preheated oven and bake for 55-65 minutes, or until a long toothpick or skewer inserted into the very center of a loaf comes out clean.
6. Cool and Serve:
Let the loaves cool in their pans for 10 minutes. Then, carefully run a knife around the edges and invert them onto a wire cooling rack. It’s tempting, but allow the bread to cool for at least 30 minutes before slicing. This helps it set and makes for cleaner slices, revealing the beautiful cinnamon swirl.
The “Friendship” Part: Continuing the Legacy
After you’ve used your starter on Day 10, you’ll have about 1 cup of leftover batter if you followed the “add-back” method. This is your gift to keep the tradition alive!
Place 1 cup of the starter batter into each of four 1-cup containers (like glass jars or new zip-top bags).
Give three away to friends with a copy of the Day 1-10 instructions and this recipe.
Keep the fourth to begin your next 10-day cycle, starting back at Day 1. If you don’t wish to bake again immediately, the starter can be frozen (thaw in the refrigerator before using and resume the day cycle).
Nutritional Information (Per Slice, 1/12th of a loaf)
Calories: ~280 kcal
Total Fat: 12g (15% DV)
Saturated Fat: 2g (10% DV)
Cholesterol: 35mg (12% DV)
Sodium: 150mg (7% DV)
Total Carbohydrates: 42g (15% DV)
Dietary Fiber: 1g (4% DV)
Sugars: 27g
Protein: 4g