Active Prep Time: 30 minutes
Hands-on Baking Time: 1 hour
Difficulty Level: Medium (requires patience and attention to detail, but no advanced techniques)
Yield: 1 beautiful round loaf (a “boule”), about 1.5 lbs
There’s something magical about pulling a crackling, deeply bronzed loaf of sourdough from your own oven. The process is a gentle dance with wild yeast, a slow fermentation that develops incredible flavor and an open, airy crumb. This recipe breaks down the timeless art of sourdough baking into clear, manageable steps. While it takes time, most of it is hands-off, allowing the dough to develop its signature tang and texture naturally.
Ingredients
435 grams (about 1 ¾ cups + 2 tbsp) bread flour (high-protein flour like King Arthur is ideal)
65 grams (about ½ cup) whole wheat flour (for flavor and complexity)
350 grams (1 ½ cups) lukewarm water (90-95°F / 32-35°C)
100 grams (about ½ cup) active, bubbly sourdough starter
10 grams (about 1 ¾ tsp) fine sea salt
Rice flour or extra bread flour, for dusting
Equipment
Digital kitchen scale (highly recommended for accuracy)
Large mixing bowl
Bench scraper
Banneton (proofing basket) or a medium bowl lined with a well-floured kitchen towel
Dutch oven with lid
Razor blade or very sharp knife (lame)
Parchment paper
Method
Day 1: Evening – The Levain & Autolyse (10 minutes active)
Time: 7:00 PM (example)
Intensity: Low
Feed Your Starter: Ensure your sourdough starter is active, bubbly, and has been fed 4-12 hours before you begin. It should pass the “float test” (a small spoonful dropped in water floats).
Create the Dough: In a large bowl, combine the bread flour, whole wheat flour, and 350g of water. Mix with your hands or a spatula until no dry flour remains. It will be a shaggy, rough mass. Cover the bowl and let it rest for 30 minutes. This rest period, called the autolyse, allows the flour to fully hydrate and gluten to begin developing naturally.
Day 1: Evening – Mixing & Bulk Fermentation Begins (10 minutes active)
Time: 7:30 PM
Intensity: Medium
Incorporate Starter and Salt: Add the 100g of active starter to the bowl. Use wet hands to pinch and fold the starter into the dough until it is relatively incorporated—this will take a minute or two. Let it rest, covered, for another 20-30 minutes.
Add Salt: Sprinkle the 10g of salt over the dough. Add a few drops of water to help it dissolve. Use wet hands to pinch and fold the salt into the dough thoroughly. It will feel wet and slack initially.
Begin Bulk Fermentation: Cover the bowl tightly with a damp towel, reusable wrap, or lid. This begins the bulk fermentation, which will last 10-12 hours at room temperature (68-72°F / 20-22°C is ideal).
Day 1: Night – Coil Folds (5 minutes active, 3x)
Time: 8:30 PM, 9:30 PM, 10:30 PM (example)
Intensity: Low
Strengthen the Dough: Over the next few hours, perform 3-4 sets of “coil folds,” spaced about 45-60 minutes apart. With wet hands, reach under one side of the dough in the bowl, gently lift it up, and fold it over onto itself. Rotate the bowl a quarter turn and repeat on all four sides. This gently builds gluten strength without kneading. After the last fold, let the dough rest, covered, undisturbed for the remainder of the bulk fermentation.
Day 2: Morning – Shaping & Final Proof (10 minutes active)
Time: 7:00 AM
Intensity: Medium
Check the Dough: After 10-12 hours, the dough should look visibly bubbly, jiggly, and have increased in volume by about 50%.
Shape: Lightly flour a clean work surface. Gently turn the dough out. Using your bench scraper and floured hands, gently shape it into a round (a boule). Create surface tension by pulling the dough toward you, rotating it, and tucking the edges underneath.
Prepare for Proofing: Generously dust your banneton or towel-lined bowl with a 50/50 mix of rice flour and bread flour (rice flour prevents sticking beautifully). Place the dough seam-side up into the basket. This means the smooth, rounded side is facing down, and the seams where you tucked are facing up.
Day 2: Morning – Final Proof & Preheat (5 minutes active)
Time: 7:15 AM – 11:00 AM
Intensity: Low
Final Proof: Cover the basket with a reusable bag or plastic wrap. Let it proof at room temperature for 2-4 hours. Alternatively, for more flexibility, place it in the refrigerator for a cold proof for 6-14 hours (this develops even more flavor).
Preheat: About 45 minutes before you’re ready to bake, place your Dutch oven with its lid into your oven and preheat to 500°F (260°C).
Day 2: Afternoon – Baking & The Grand Finale (15 minutes active, 45 minutes inactive)
Time: 11:00 AM
Intensity: Medium-High
Score the Dough: Carefully remove the screaming-hot Dutch oven. Turn your proofed dough out onto a sheet of parchment paper (the smooth side is now on top). Using your razor blade, make one confident, swift slash about ½-inch deep across the top. This controls expansion and creates the “ear.”
Bake Covered: Using the parchment as a sling, lower the dough into the hot Dutch oven. Put the lid back on and place it in the oven. Reduce the temperature to 450°F (230°C).
Bake: Bake with the lid on for 20 minutes. This creates a steamy environment for a great oven spring and a crispy crust.
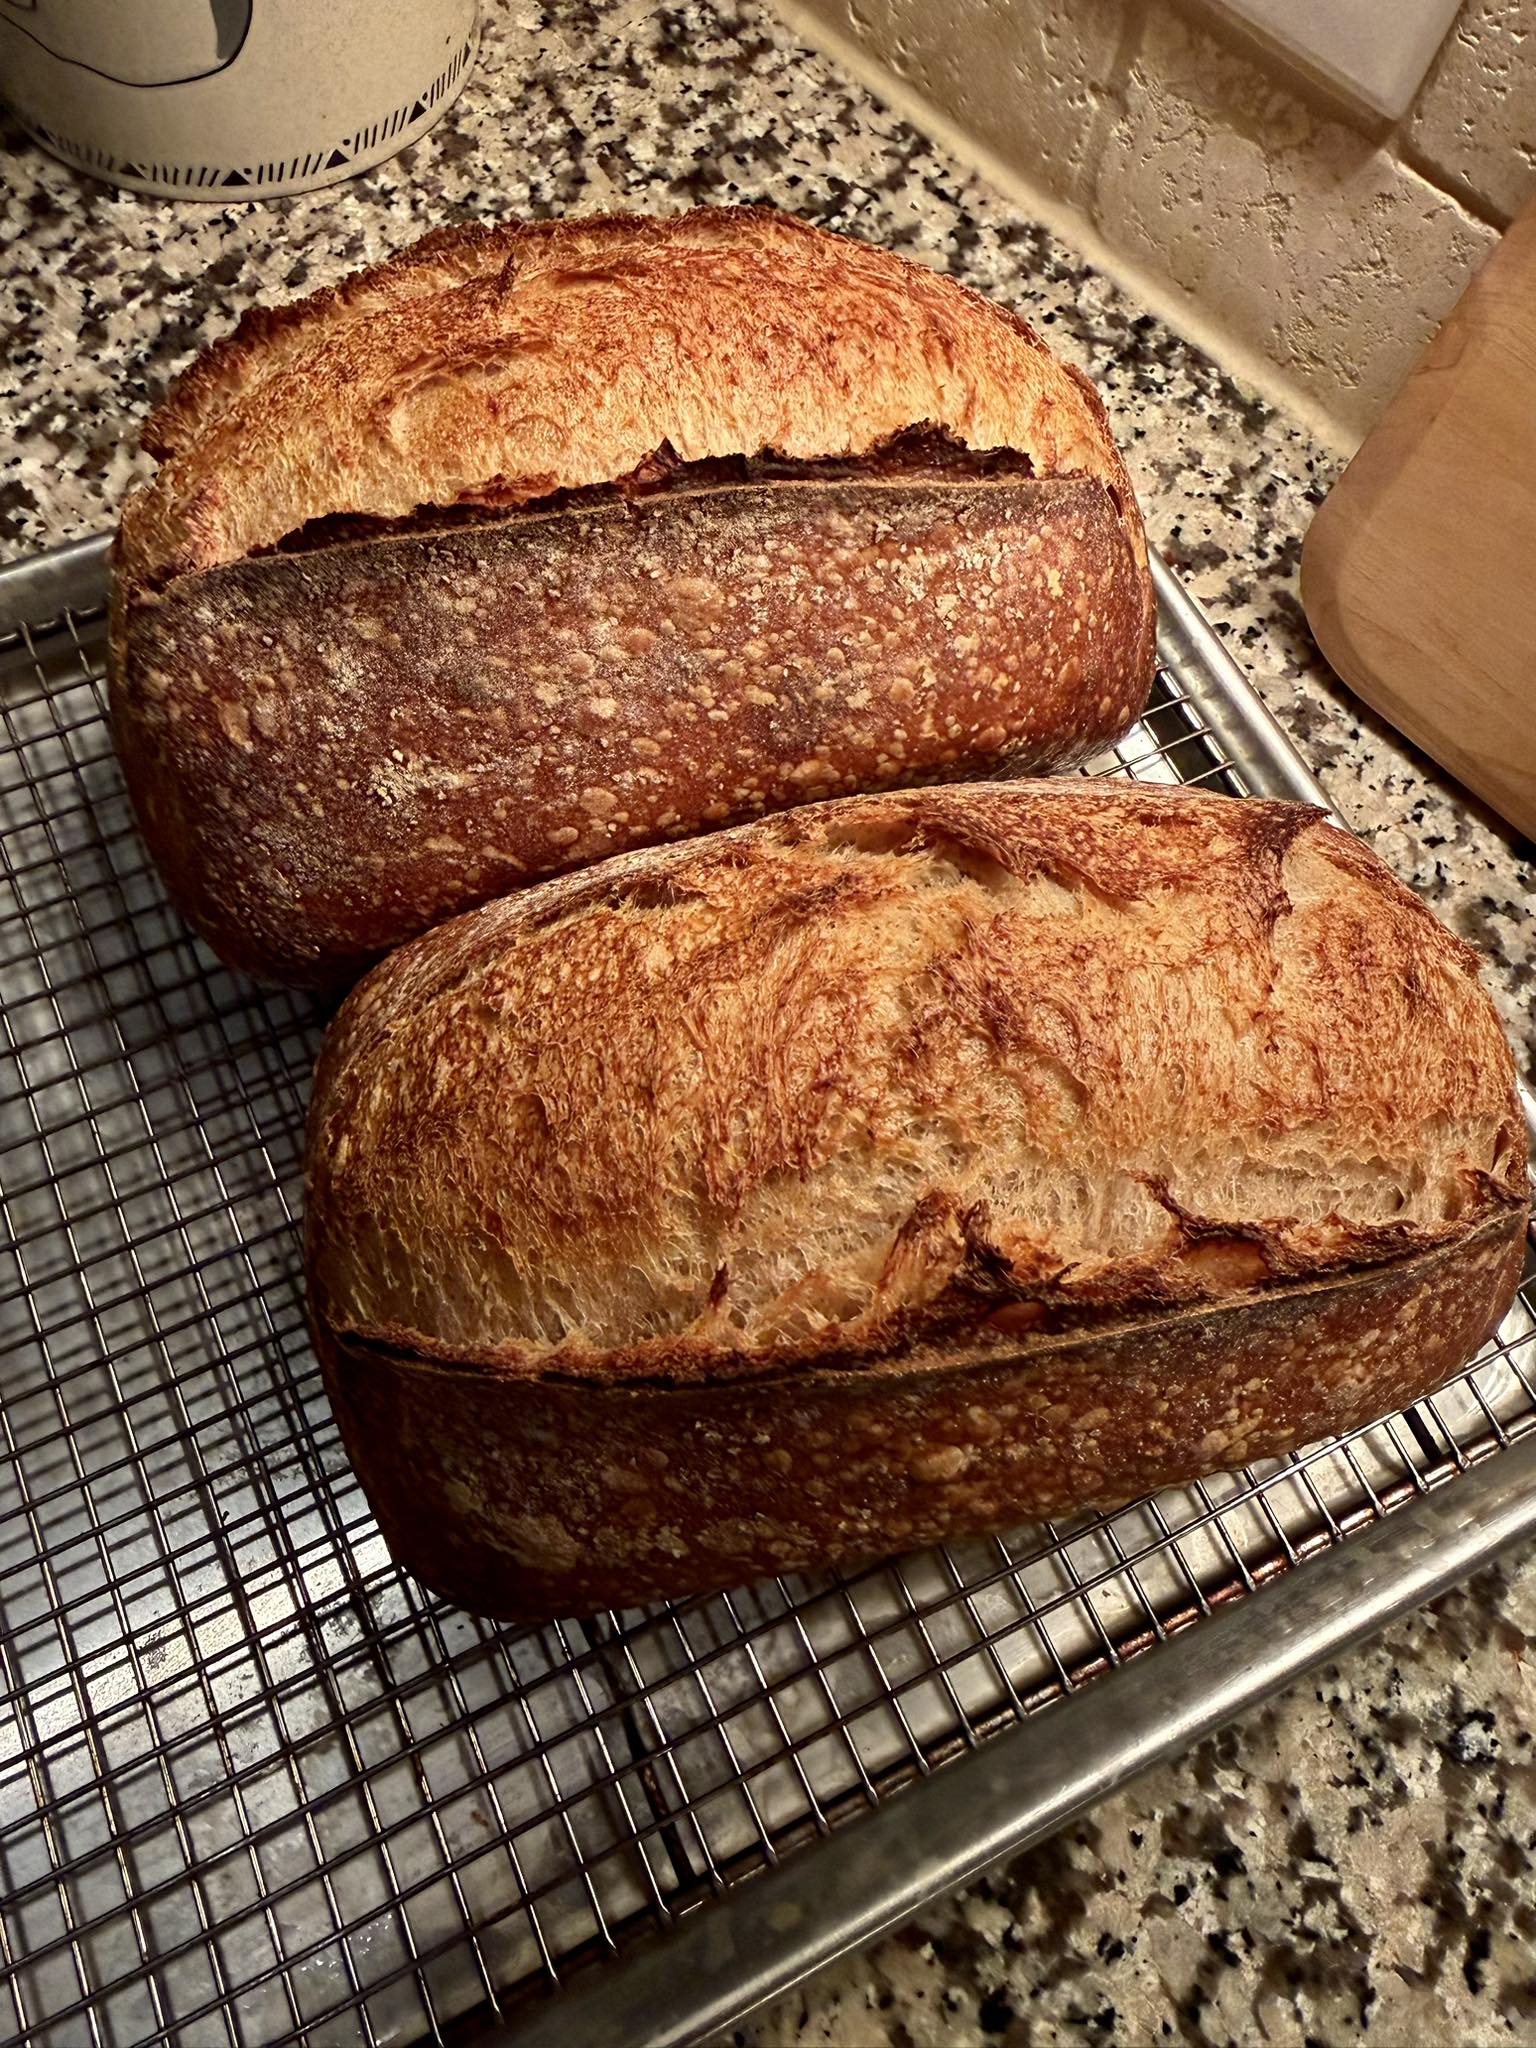
Bake Uncovered: Carefully remove the lid. The loaf will be pale and have expanded. Bake for another 20-25 minutes with the lid off, until the crust is a deep, glorious golden-brown and the internal temperature reaches 208-210°F (98-99°C).
Cool: This is the hardest step! Transfer the loaf to a wire cooling rack and let it cool completely for at least 3-4 hours before slicing. The interior is still cooking from residual heat, and cutting too soon will result in a gummy crumb.
Nutrition Information (Per 1/12th of the loaf)
Calories: ~145 kcal
Total Fat: 0.5g
Saturated Fat: 0.1g
Sodium: 325mg
Total Carbohydrates: 30g
Dietary Fiber: 1.5g
Sugars: 0.2g
Protein: 5g